
-
 2294 Hits
-
 72.08% Score
-
 2 Votes
|
|
Route |
|---|---|
|
|
31.92780°N / 109.97774°W |
|
|
Trad Climbing |
|
|
Spring, Summer, Fall, Winter |
|
|
Most of a day |
|
|
5.11 (YDS) |
|
|
5 |
|
|
Overview/Approach

One of the finest routes in Arizona or anywhere. Every pitch is hard. Every pitch is different. The position of the route is incredible.” I took this quote off of MP.com and would have to concur with it. The 2nd pitch off-width is the test OW piece in the Stronghold. It is sustained from bottom to top. The 3rd pitch layback/stem pitch is steep and sustained at the grade. The 4th pitch offers more variety in a single pitch than many routes in Cochise offer for an entire route: fingers, face, off-width, stemming, chimney. The 5th pitch offers, for me, the crux of the climb if you attempt to climb it straight up which was done by accident originally (5.10+ to 5.11 depending on who you ask and how tall they are). The FAers of this route put in a “pendulum” bolt and a climbing party mistook it for a pro bolt and sent the ground above, coming back later to add an additional bolt to their variation. Either way, it gives you two different finishes.
Hike up to the Rockfellow Group from either side of the Stronghold. Approach as you would for End Pinnacle, etc. Near the col, traverse left directly below the north face of Rockfellow Dome. Hike a climber’s trail up to a beautiful alcove where Knead Me is located on the right and Abracadaver is located on the left. Start up the leaning ramp utilizing pockets for protection to a fixed rap ledge.
“One of my favorite moments is when you are hiking along and notice a rabbit crouched under a bush nearby. It sees you too, but it’s not scared exactly, because it knows you’re there, and you didn’t surprise it. It’s got those big brown eyes and it’s just kinda looking at you quietly. I love when that happens and it’s always a special moment. There are a couple of places in southern Arizona where I feel like that rabbit and one of those places is under the north face of Rockfellow Dome. There is a big part of me that gets quiet, and my eyes, which are blue, get kinda brown.” Dave Baker
Route Description
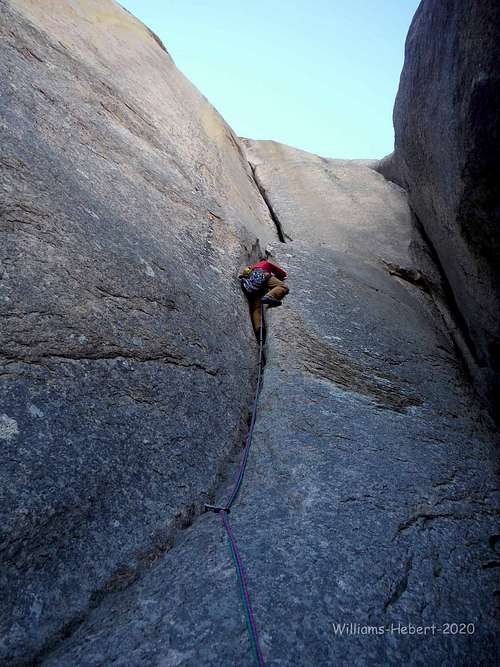
1st Pitch- 70’-5.10/ Climb the awkward slanting ramp corner (“shallow groove”) to the comfortable belay below the obvious off-width. There is a bolt and piton on this pitch, but neither are much use as of 2021. The pitch protects reasonably well without them via small cam pockets. The crux is about half way up at the rusty bolt and hanger where the ramp steepens and you start to lose feet. It is a reachy move or two and then eases up to the fixed rap anchor.
2nd Pitch- 90’-5.10/ This off width is considerably more sustained than Shake N Bake’s off-width pitch. I went left side in with one turn around early on, then back to left side in. Fist stacks seemed to serve a purpose early on allowing me to ride my right foot up on the outside edge's precarious features. Chicken wings never come along until near the end where it eases up anyway. A technical left heal-toe was the most useful technique. Someone mentioned that #5’s and #6’s get in the way vs burying smaller gear and that is true to a point. I only needed a single of each and they were easier to bump than smaller gear which at times would have been difficult to set (tipped out). Can leave the #5 and #6 at the top of this pitch if utilizing the double rope rap. Full hanging belay off of a pair of fixed nuts (2020) below where it pinches down to a finger corner. There is one single bolt on the right wall early on this pitch for some reason (protection is no different than any other part of the pitch).
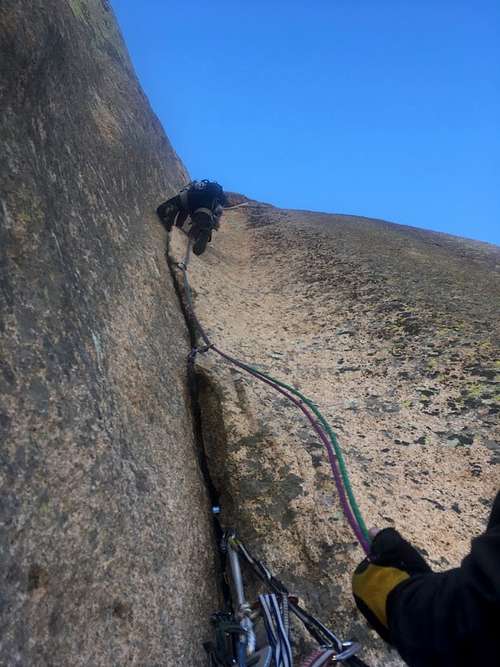
3rd Pitch- 75’-5.11-/ This is a sharp rock finger corner. In cold weather beware as it is very grippy on the fingers. Layback and stem up the vertical to slightly overhanging finger corner. The climbing at the grade is up this corner. At the top is a roof. Place gear on the traverse left and a #.75 protects an airy move left and up to a rounded hold. Move left yet again to a comfortable sloping ledge with a fixed belay/rap.
4th Pitch- 165’-5.10 PG/ This is the most versatile pitch of the climb and one of the most versatile trad pitches in all of the Stronghold. The crux is the shallow flake corner directly above the belay. Clip a fixed nut (2020) and place small to micro gear in the somewhat blind corner (PG) as you maneuver the face out right and corner’s edges up to chicken heads that head straight up to an off-width. A sporty lead. Then up a short section of off-width through a tree and make an awkward slide up the wide curving crack above, past another tree, into a calming short chimney (right side of the massive flake ledge). Climb the easy short chimney. Comfortable gear belay atop the flake.
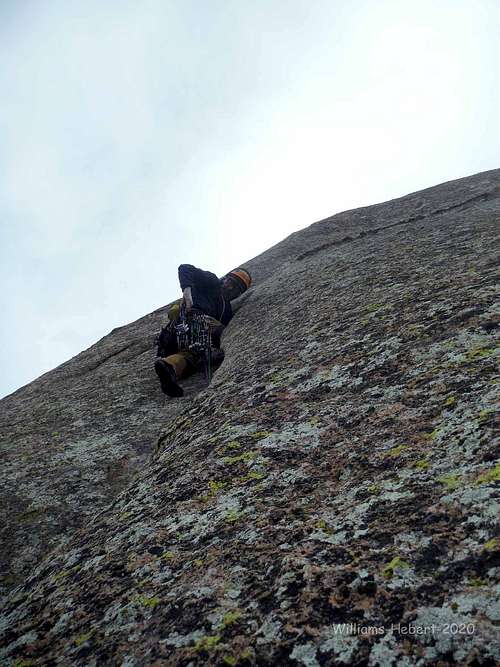
5th Pitch- 125’-5.10+ PG/ Climb the left facing corner well below grade to above the dike and clip the first of two bolts. Make a committing slab move at the grade off of the dike, somewhat height dependent, and climb runout ground through the 2nd bolt, below the grade An alternative (original FA finish) is to clip the bolt and traverse the dike way out left to the finish hand crack on Jabberwock. The guide references using a pendulum (A0), but the traverse can be led out left without aid/pendulum (PG). A 200’ rope reaches a significant tree for a comfortable belay on a huge sub summit ledge.
Climbing Sequence
|
|
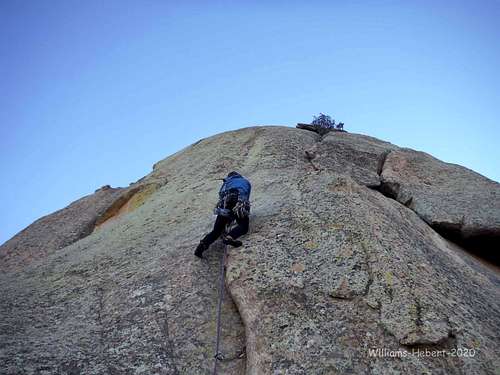 4th Pitch, 5.10 PG 4th Pitch, 5.10 PG |
|
Descent
There is a relatively new three single 70m rap descent located up and left from the top of Jabberwock’s top anchor. It is located on the upper wall where you can just walk over to it vs descending back to the top of Jabberwock. However, if you left your large gear at the top of pitch two, you need to use the double rope rap from the top of Jabberwock.
Rap 150’ from the top of Jabberwock to a fixed rap directly below the large flake you built your gear belay atop pitch #4. Watch your ropes so that your ends do not go into the final hand crack on Jabberwock. There are fixed rap hangers on Jabberwock below the crack as well, but you are looking for two old bolts/chains and a modern fixed rap hanger down (2020) and climbers right.
Rap 100’ down to the base of pitch 4.
Rap 200’ back to the base of the route, picking up any left cams atop pitch 2 along the way.
Essential Gear
Single from micro to #6. Doubles from micro to #4. Off-set wires and or off-set cams helpful on pitch #4. Shoulder length slings. 70m rope or doubles depending on your preference regarding leaving the large pieces atop pitch #2. Route is true north facing. Will be much colder and windier than you might anticipate in the winter on approach.